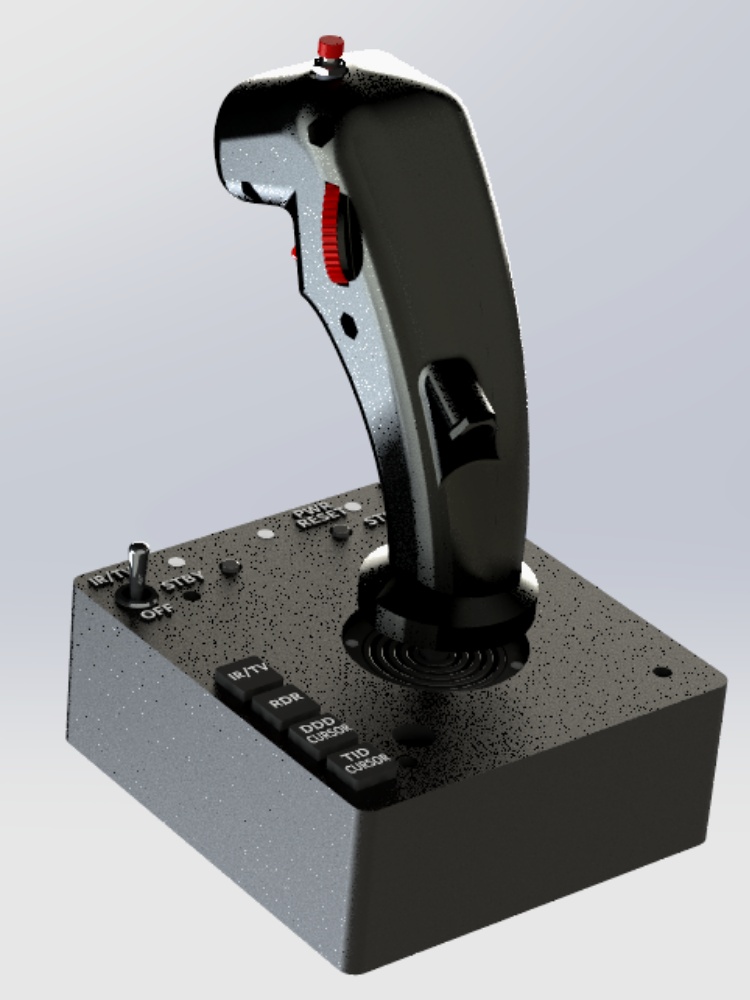
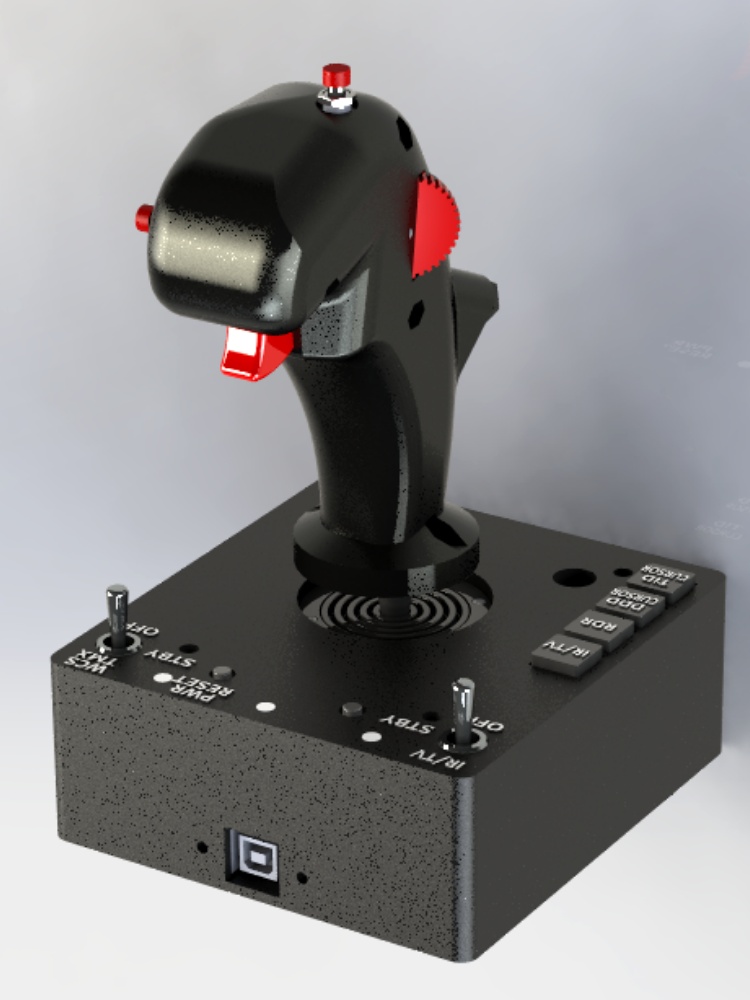
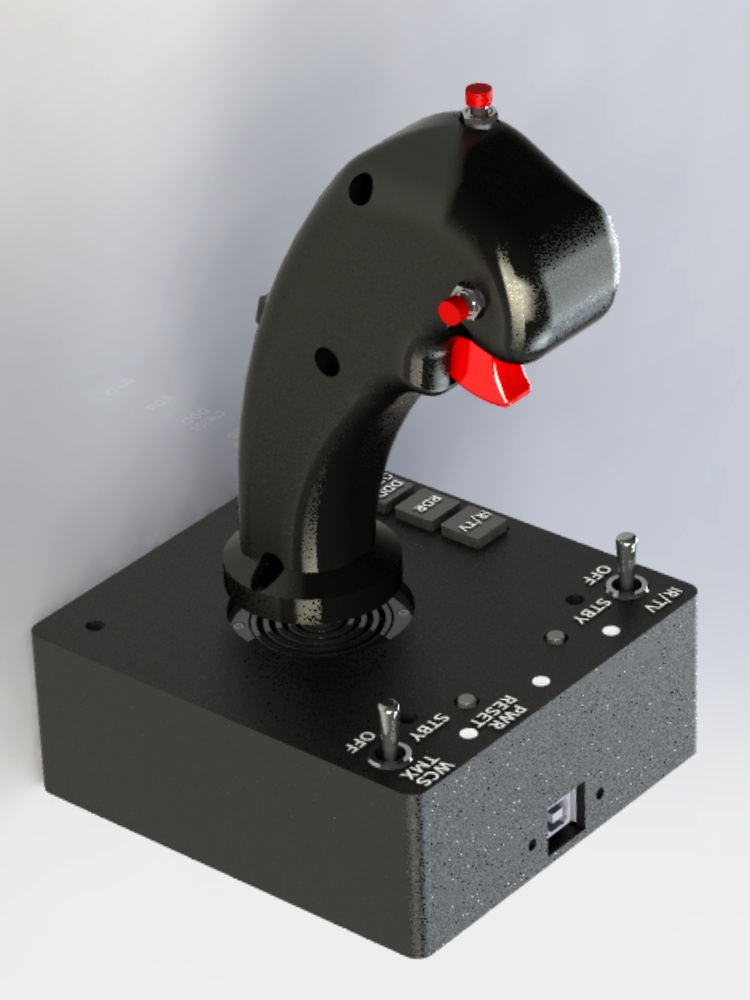
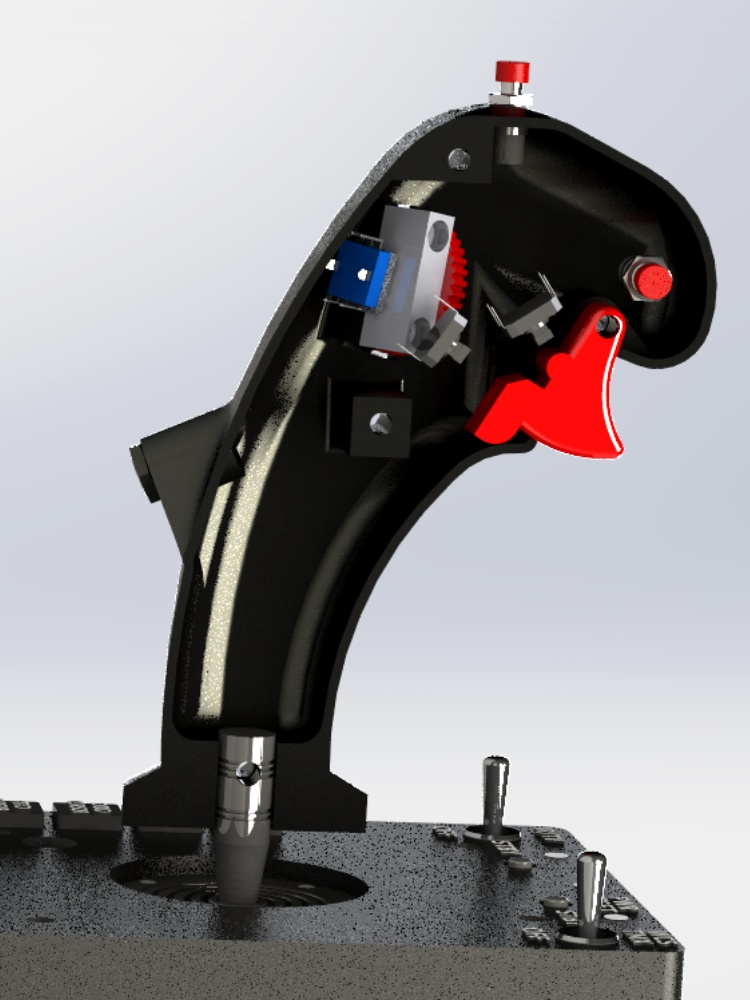
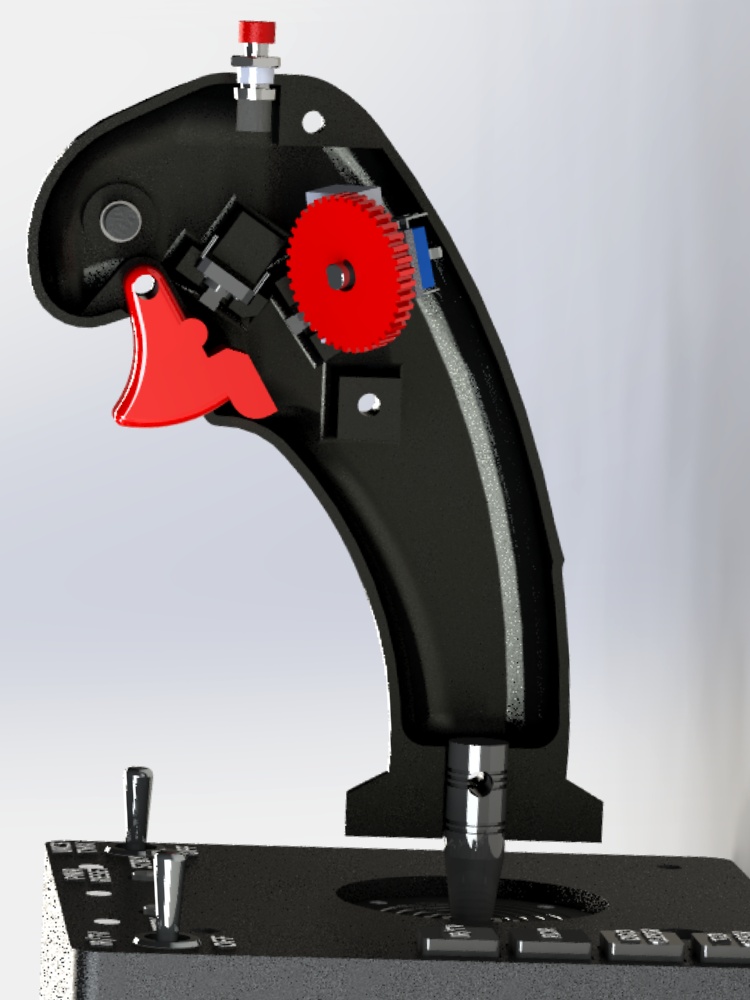
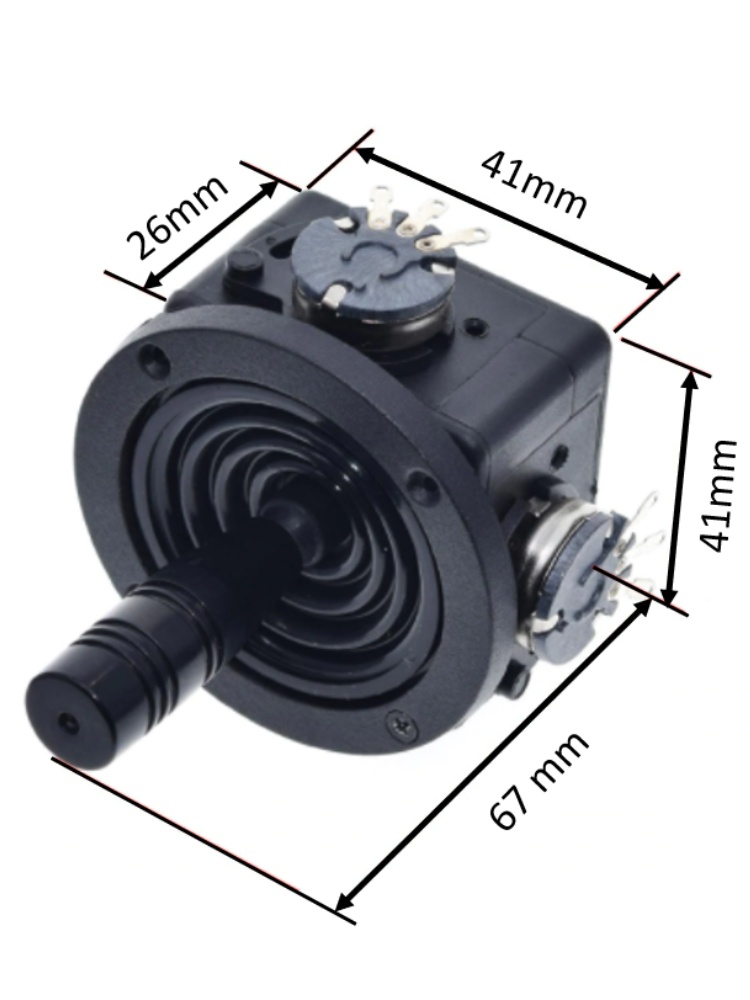
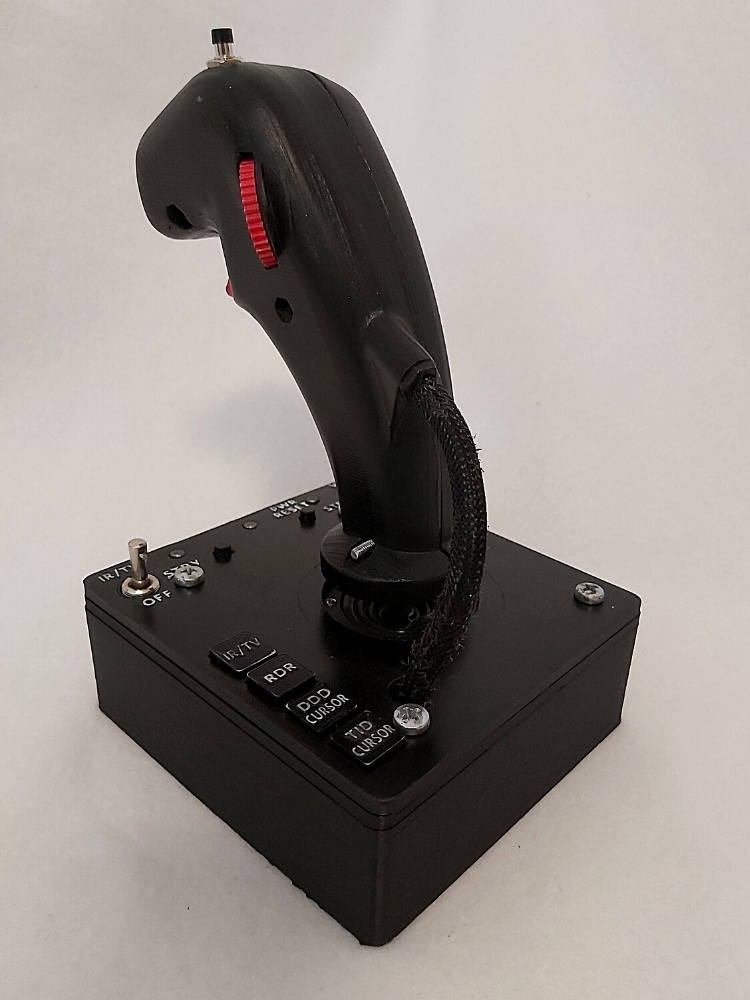
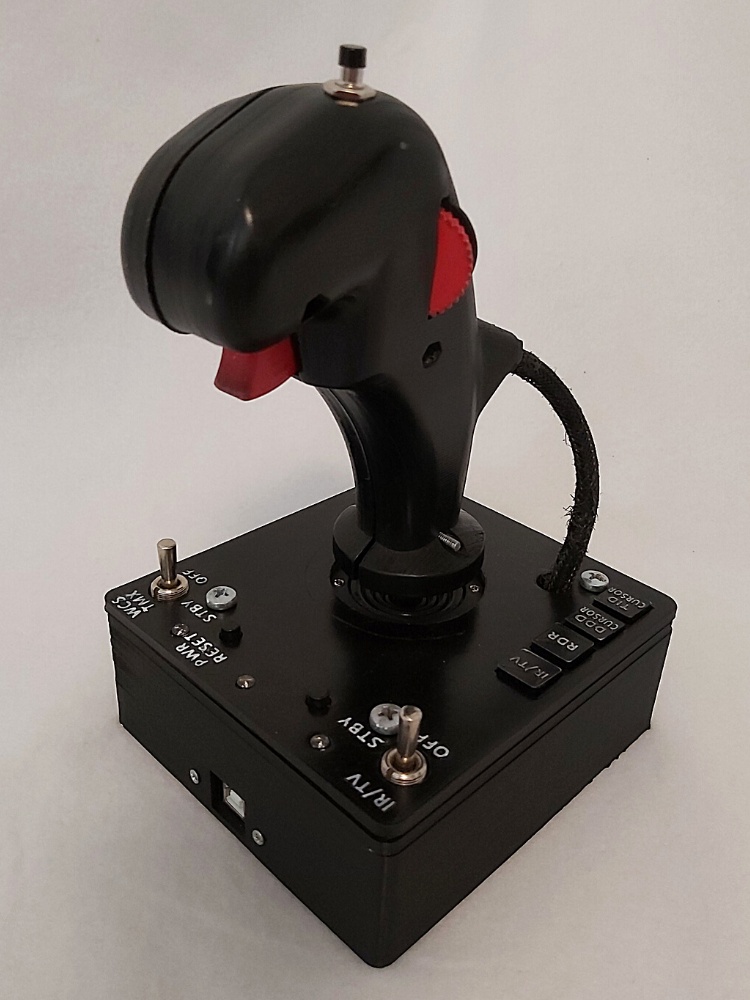
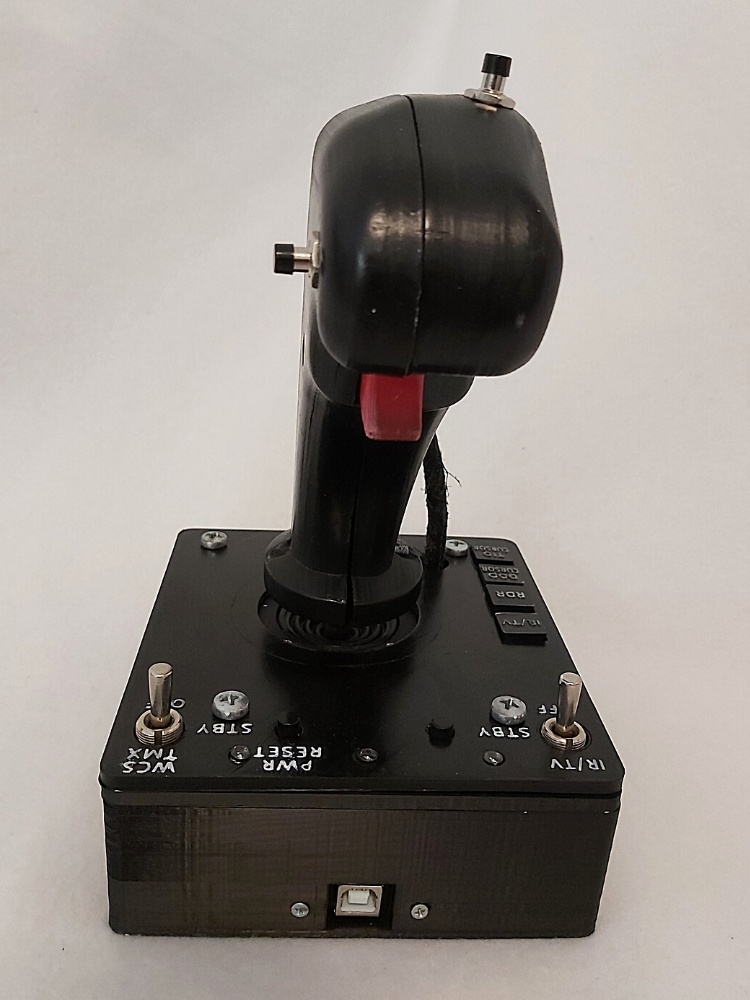
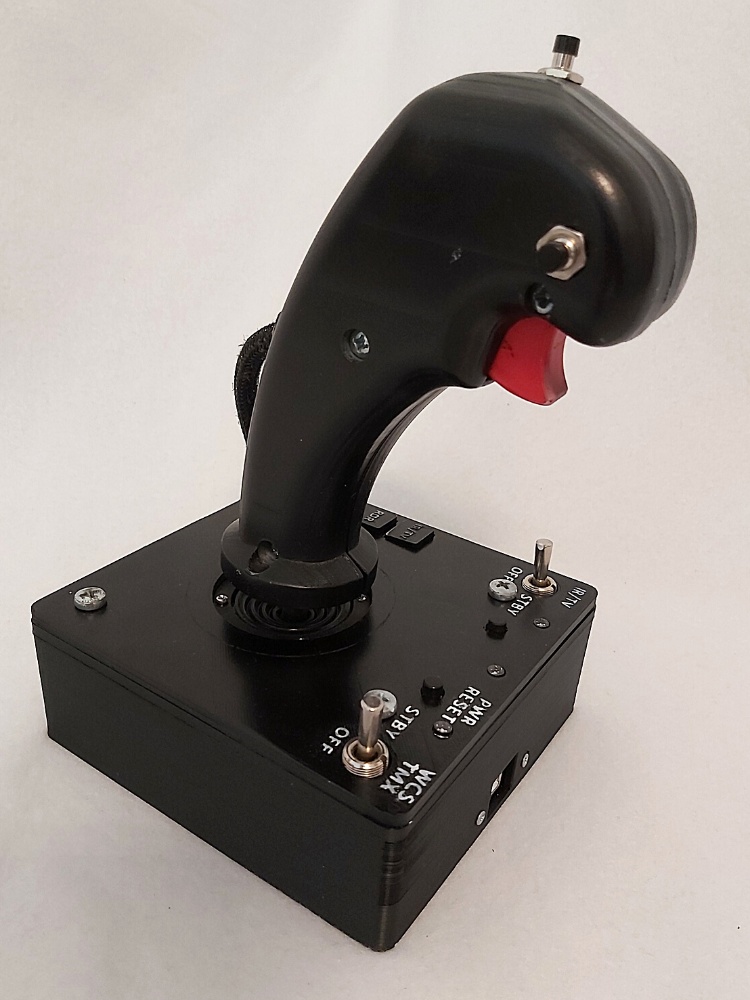
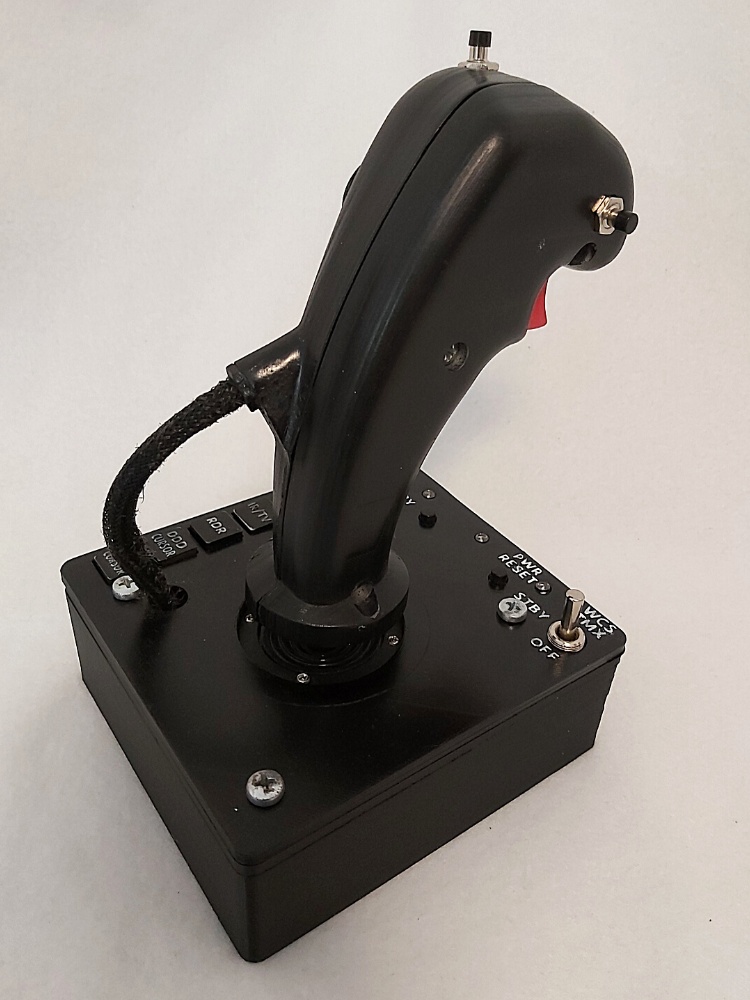
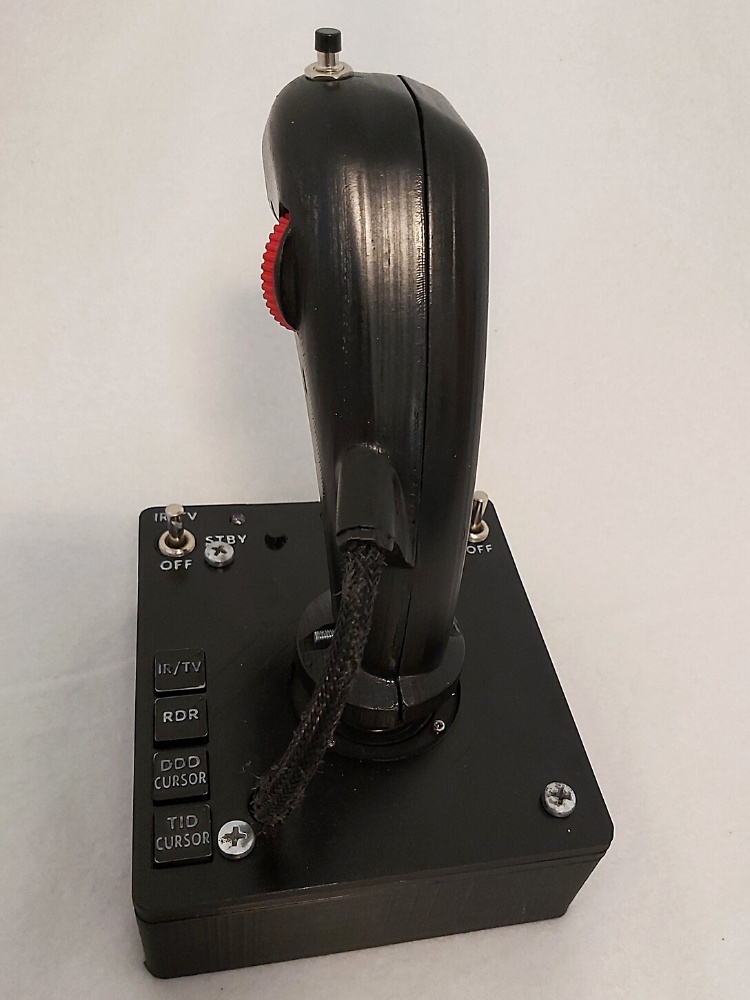
This is an F-14 RIO HCU model replica. The model includes all electronic parts and micro-stick with potentiometers needed for 3d-printing and assembling a fully functional F-14 RIO HUC that operates with flight simulations.
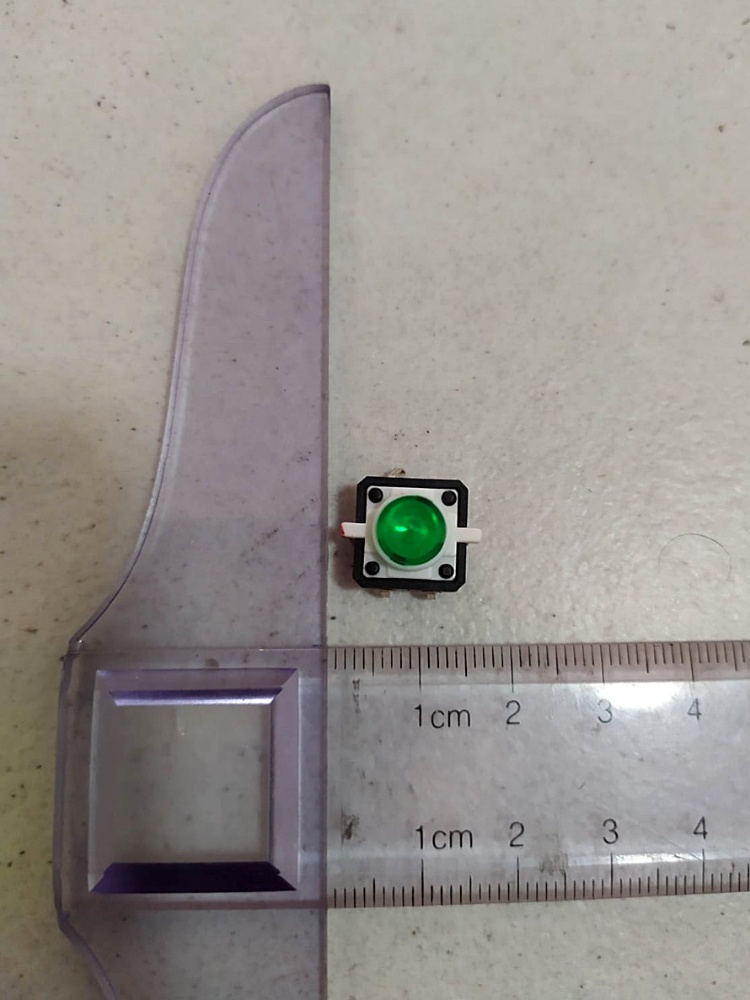
For illuminated buttons - use white material for printing, paint in black and then gently sand the text (illuminated micro-switch modeled).
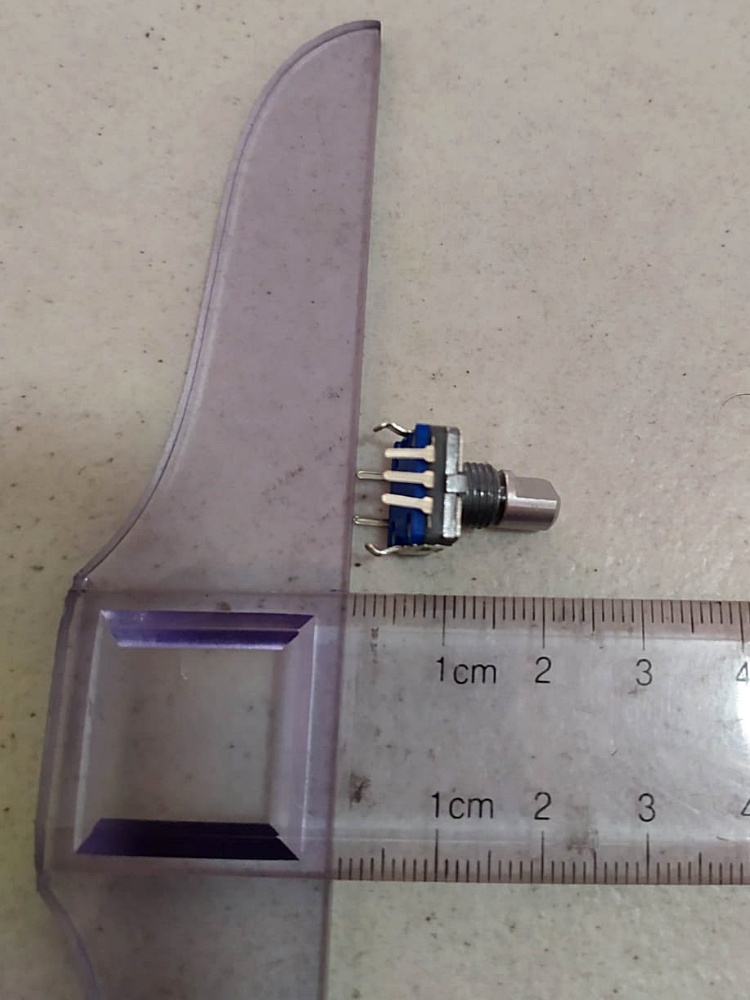
All electronic parts are standard parts, as can be seen in the pictures.
File Formats Included:
STL - 30 STL files, in 1 zipped file
STEP - 1 zipped STEP file
PARASOLID - 1 zipped X_T file
Mechanical parts needed for assembly:
- M4 bolt, length 30 mm with M4 nut - for the stick body.
- M4 bolt, length 30 mm - box closure.
- M2.5 bolt, cone head - for the connector adapter.
- Spring, diameter approximately 5 mm, length approximately 20 mm - for the first detent trigger.
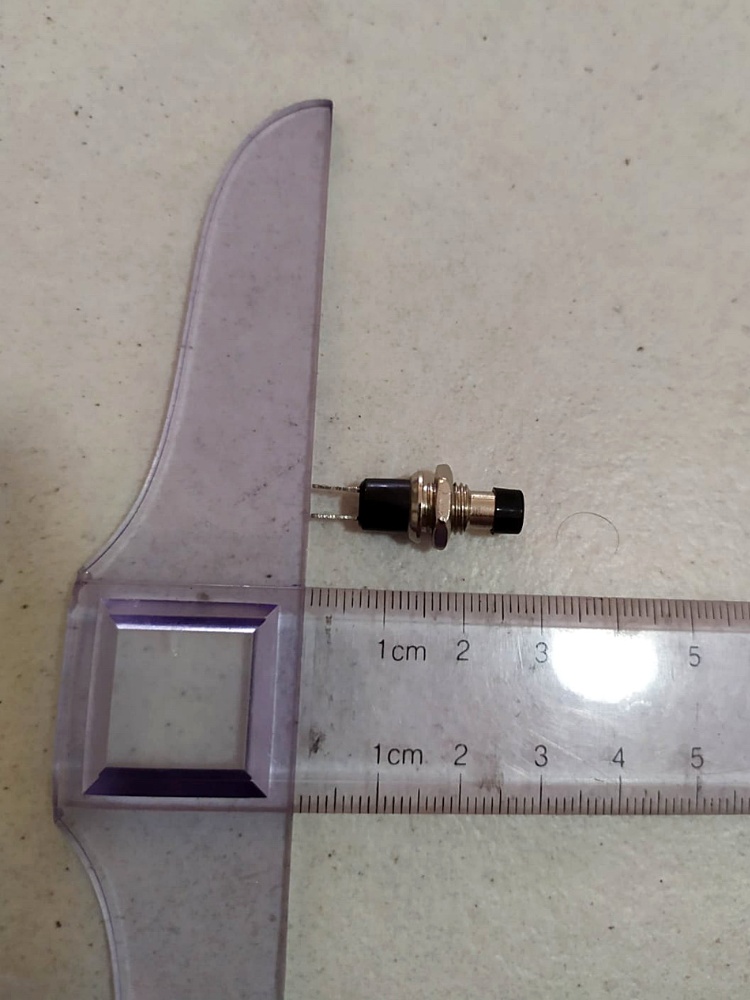
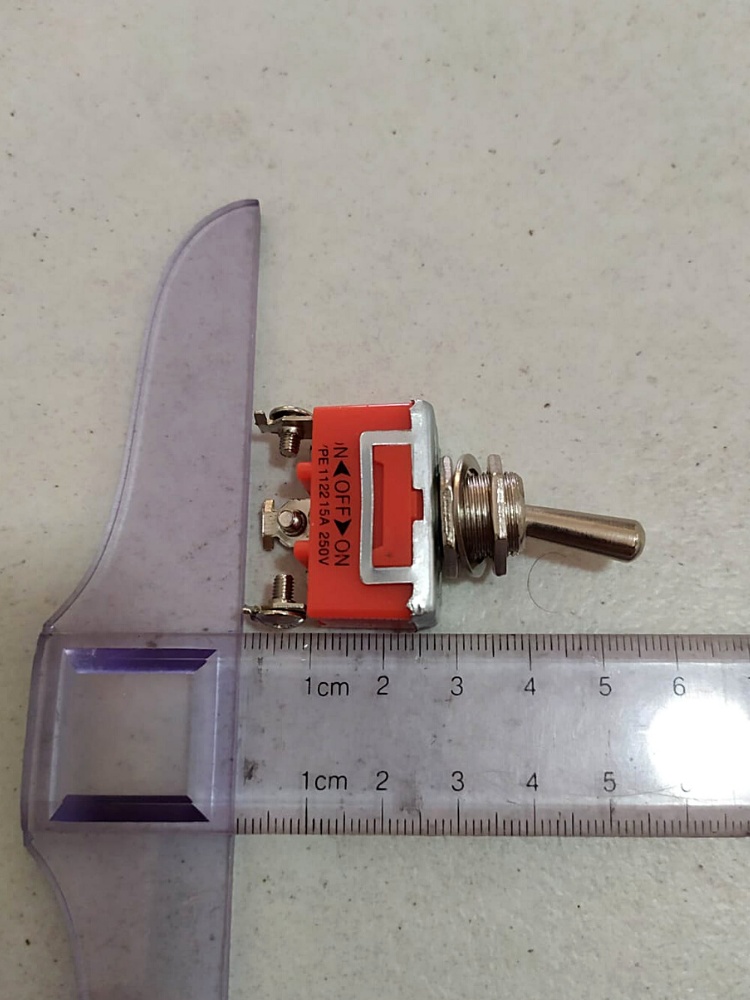
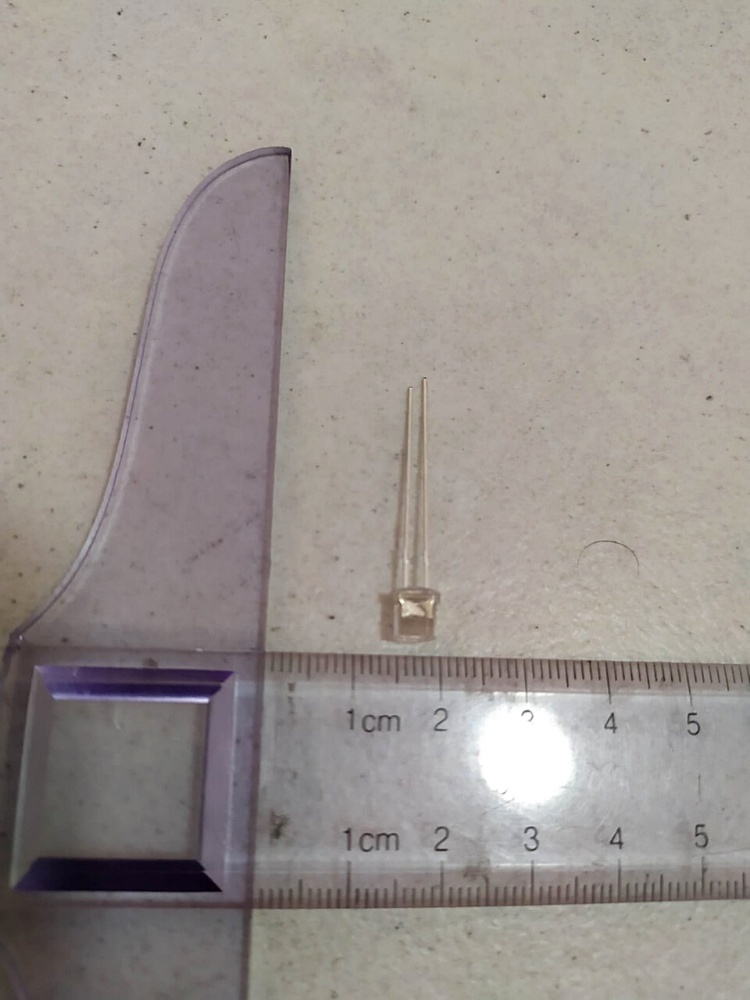
Electrical parts needed for assembly:
- Micro stick JH-D202X-R2 - for the main stick.
- Rotary Encoder Push Button 12 mm - for the thumb wheel.
- ON/OFF/ON Toggle Switch - for the WCS, IR/TV On/Off toggles.
- Push Button Mini Switch - for 2 buttons on the stick and two on the box.
- Illuminated microswitch 12 mm - for the back light buttons
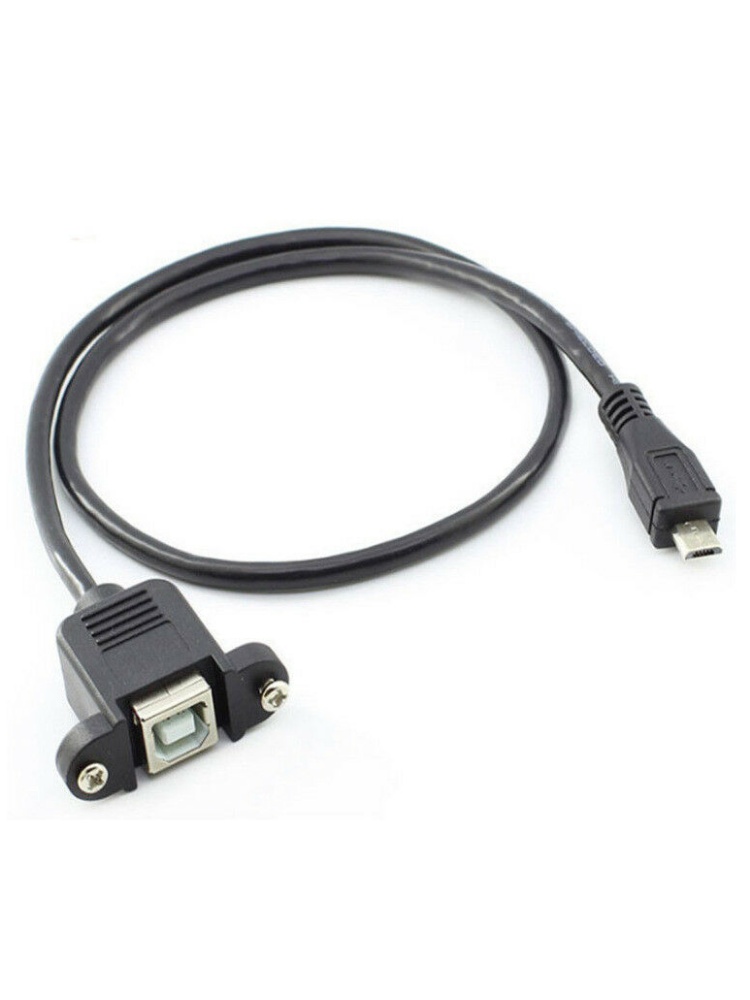
- Micro USB 5 Pin Male to USB 2.0 B Female Panel Mount Type Cable with Screws
- Microswitch 12 mm - for the two stages trigger.
- LED green 5 mm flat head - for 3 lights at the box.
Printing Recommendations:
- For a metal feel of the grip - Use Aluminum infused PLA.
- Printing in normal setup:
- Layer Height: 0.12-0.22mm
- Printing Speed (for all parts): 50 mm/sec
- Temperature according to the printing material.
- For the buttons and box cover:
- Layer Height: low - 0.12-0.15mm
- Printing Speed: 30 mm/sec
- Color Recommendation: White color printing, with black painting and gentle sanding of the writing.
- All settings are relevant to Flashforge Creator Pro printer and may differ from one 3d printer to another.